Last Monday, a homeowner in Thika spent KSh 2,500 on materials for a simple DIY project, only to watch the bond fail before the sun went down. It’s a frustrating waste of time and money, but mastering how to apply liquid adhesives is the secret to making your repairs stand the test of time. Glue shouldn’t be a source of stress or a messy disaster that ruins your favorite furniture.
You likely want a clean finish that looks like it came straight from the factory, not a sticky clump that peels away after just a few days. At Thika Wax Works, we believe every Kenyan home deserves the best care, which is why we’ve shared our manufacturing expertise with families since the 1950s. We promise to show you the easiest ways to use liquid glues for a bond that stays strong for years. Our methods act like a bridge, connecting two separate pieces into one solid, unbreakable unit.
This guide explains how to prepare your surfaces and exactly how much product to use for a professional result. You’ll gain the confidence to choose the right glue for any job, ensuring a tidy finish every time you pick up a bottle.
Key Takeaways
- Master the basic steps of how to apply liquid adhesives to create a bond that starts like a liquid bridge and dries into a solid wall.
- Learn the secret to prepping your surfaces correctly so your glue has a clean, strong grip that lasts for years.
- Avoid the “too much butter” mistake that causes projects to slide around and discover the importance of letting your glue set properly.
- Pick the right tools for the job, from small paint brushes for crafts to large rollers for your home repair projects.
- Trust in the heritage of Kenyan-made adhesives from Thika Wax Works that have been serving our community with quality since the 1950s.
What Are Liquid Adhesives and How Do They Work?
Since the 1950s, Thika Wax Works has provided reliable solutions for Kenyan households and local industries. When you’re learning how to apply liquid adhesives, it helps to imagine the glue as a liquid bridge. At first, the adhesive is fluid enough to flow into every tiny gap on a surface. As it dries, that liquid transforms into a solid, unbreakable wall. This transition is what creates a lasting bond between two objects. It works by soaking into microscopic holes, just like water soaks into a sponge or tea into a mandazi.
Most glues found in our local hardware stores are “cold glues.” This means you don’t need heat, melting pots, or special electrical tools to make them work. They’re ready to use straight from the bottle at room temperature. Choosing a premium liquid cold glue is the most important step for any repair or craft task. A trusted, Made in Kenya product ensures that your work meets high standards while supporting our regional economy.
The “Bridge” Metaphor for Stronger Bonds
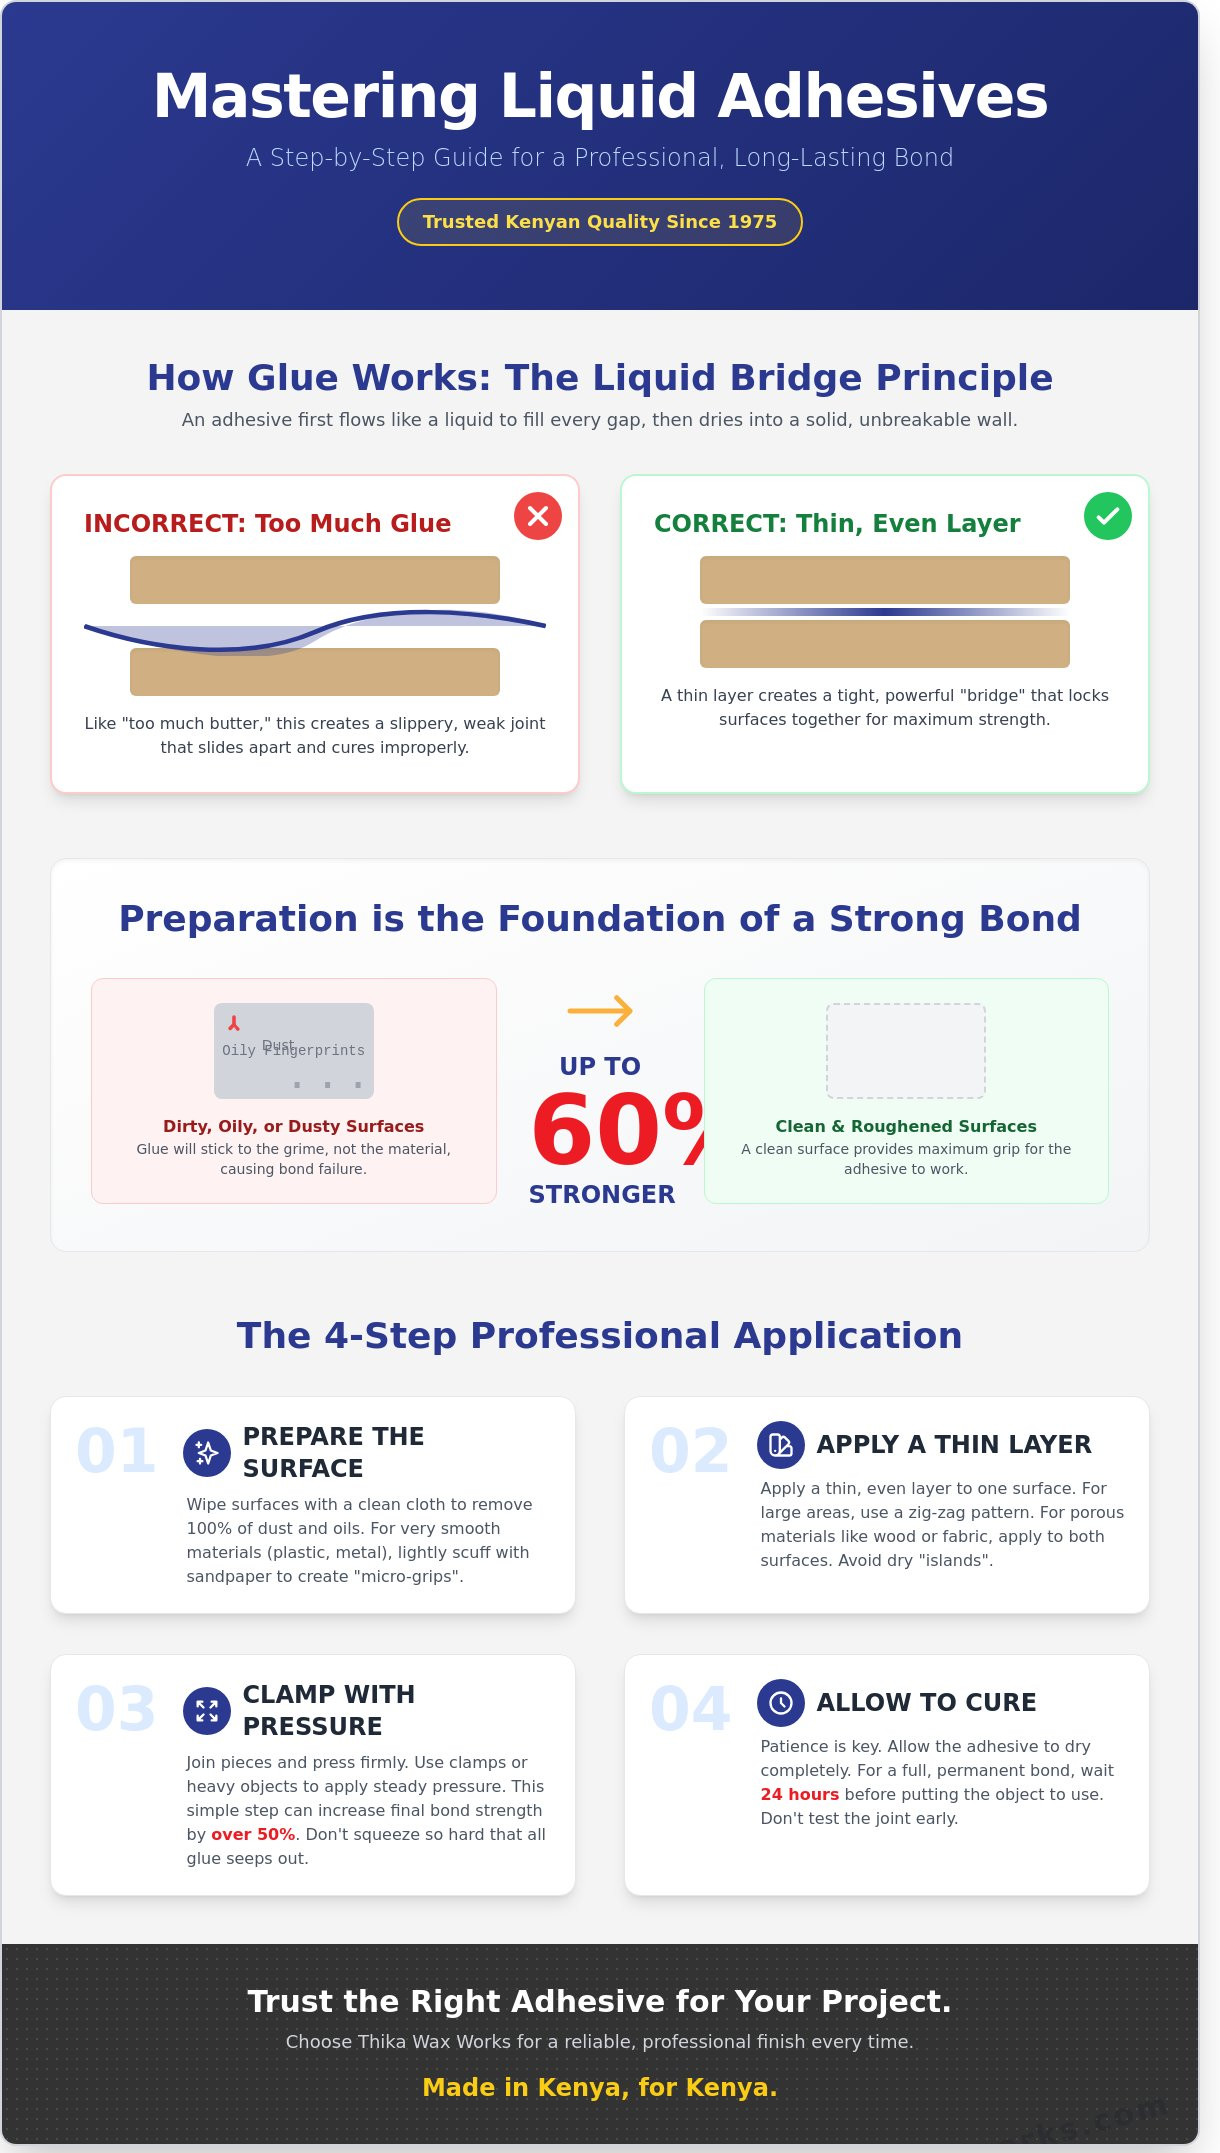
A bridge is only useful if it connects two sides firmly. If there’s a gap in the middle, the bridge fails. Glue acts the same way; it must make full contact with both surfaces to hold any weight. You might think that a thick puddle of glue makes a project stronger, but the opposite is usually true. A thin, even layer creates a much tighter “bridge” than a messy glob. When the layer is thin, the two pieces stay closer together, which makes the final bond much harder to snap. You want a connection that stays strong for years, not just for a few days.
Why Surface Preparation is Like Cleaning Your House
Glue is very picky about what it touches. It cannot stick to dust, grime, or oily fingerprints. If you try to glue a dirty surface, the adhesive will just slide off like water on a greasy cooking plate. This is a vital part of knowing how to apply liquid adhesives correctly. For very smooth materials, like certain plastics or polished wood, use a bit of sandpaper to roughen the area. This creates “tiny handholds” for the glue to grip onto. Taking 30 seconds to wipe the surface with a clean cloth can increase your bond strength by up to 60% based on standard workshop tests.
Step-by-Step: How to Apply Liquid Adhesives Properly
Since the 1950s, Thika Wax Works has provided reliable solutions for Kenyan homes and factories. To get the best results, you must start with a clean surface. Dust, oil, and old residue act like a barrier between the glue and the material. Use a clean cloth to remove 100% of the debris. If the surface is very smooth, like plastic or metal, give it a light rub with sandpaper to help the glue grab hold.
Learning how to apply liquid adhesives correctly saves you time and money. Apply a thin, even layer of glue to one surface for most jobs. If you are working with porous materials like wood or fabric, you might need to apply it to both sides. Join the pieces and move them slightly back and forth. This movement breaks any air bubbles and ensures the glue covers every tiny gap.
Spreading the Glue Evenly
For large areas, move your bottle in a zig-zag pattern. This technique ensures that every corner gets covered without wasting product. You should avoid leaving “islands” of dry spots where the surfaces won’t touch. Use a small spreader or a brush to get a layer as thin as a piece of paper. If you need a reliable bond for your household projects, our liquid cold glues offer the professional finish you expect from a local leader.
The Importance of Clamping
Clamping is like a firm handshake; it ensures the two pieces are truly connected. Even 20 minutes of steady pressure can make a 50% difference in the final strength of the bond. Use a G-clamp or a heavy stack of books to keep the pieces pressed together while the glue sets. Don’t over-clamp your project. If you squeeze too hard, you might push all the glue out the sides, leaving nothing behind to hold the pieces together.
Finally, let the glue dry for the full time listed on the bottle. In Kenya’s varied climate, 24 hours is usually the standard for a full cure. Don’t try to move or test the joint too early. Patience is the secret to a repair that lasts for decades. Understanding how to apply liquid adhesives with this level of care ensures your work stands the test of time.
Common Mistakes That Make Your Glue Fail
Since we started manufacturing in the 1950s, we’ve seen many projects fall apart because of simple errors. Even if you know how to apply liquid adhesives, small mistakes can ruin the bond. It’s frustrating to spend time on a repair only to have it break the next day. Most failures happen because of how the glue is handled rather than the quality of the product itself. To ensure your work stands the test of time, you must avoid these frequent pitfalls.
- Using too much glue: This is like putting too much butter on bread. It just slides around and never grips the surface properly.
- Gluing the wrong materials: Not every glue is a “Super Glue” for every job. Using a wood adhesive on smooth plastic usually results in a 100% failure rate.
- Ignoring the weather: Glue is sensitive to its environment. It doesn’t like to dry when it’s too cold or very humid, which is common in different parts of Kenya.
The “More is Better” Myth
A thin, even layer is always stronger than a thick puddle. In 90% of household repairs, a thick layer of glue stays soft in the middle. This creates a weak point that will eventually snap under pressure. When you press two pieces together, the extra glue leaks out the sides. You should wipe this “squeeze-out” immediately using a damp cloth. This keeps your work looking professional and clean. For the best results, explore our liquid cold glues which are designed for smooth, easy application.
Why Waiting is Your Best Friend
Think of glue like a cake baking in the oven. You can’t pull it out early or it will collapse. There’s a big difference between “tack time” and “cure time.” Tack time usually happens within 15 minutes when the glue feels sticky to the touch. Cure time is when the bond reaches its full industrial strength. In our Kenyan climate, you should wait a full 24 hours before putting any weight on the item. Learning how to apply liquid adhesives correctly means respecting this clock. This patience ensures your repair lasts for decades, reflecting the same reliability we build into every product at Thika Wax Works.
The Best Tools for Applying Liquid Glue
Since the 1950s, Thika Wax Works has understood that the secret to a professional finish isn’t just the glue itself. It’s also about how you spread it. Think of your adhesive like high-quality paint. You wouldn’t use a twig to paint your living room, so don’t settle for poor tools when learning how to apply liquid adhesives. The right equipment ensures your project stays strong and looks neat for years to come.
- Paint brushes: These are perfect for spreading glue over wide areas like wood or fabric. Always use a quality paint brush to avoid losing bristles in your glue. A stray bristle can create a bump that ruins your smooth surface.
- Rollers: If you’re working on very large flat projects like tabletops or wall panels, a roller is your best friend. It works just like a paint roller to cover a large surface quickly and evenly.
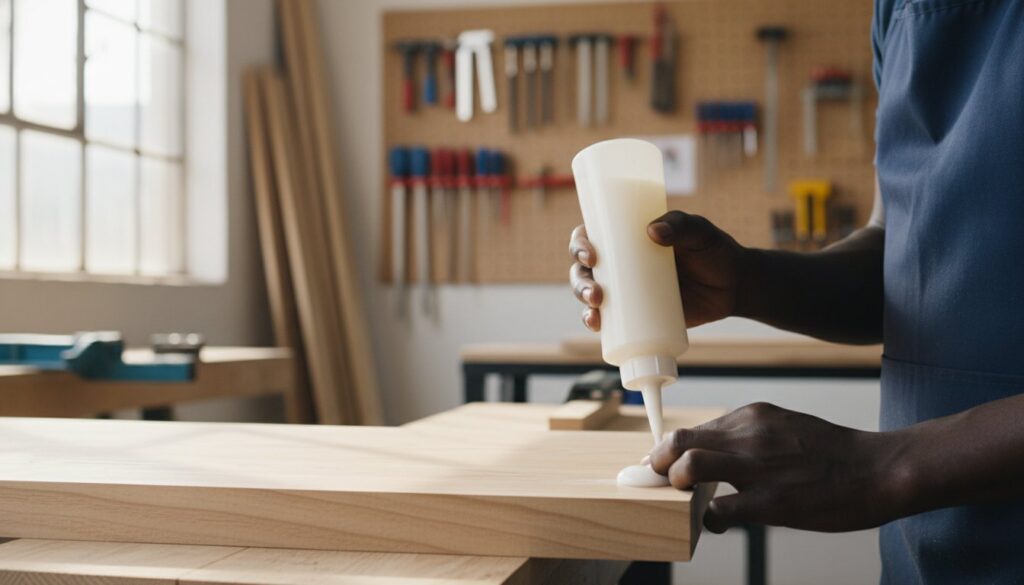
- Squeeze bottles: These are great for getting glue into tiny cracks or thin lines. They act like a pen, giving you total control over where the liquid goes.
Choosing the Right Brush Size
Picking the right brush is like picking the right shoes for a walk. Small brushes are best for detail work; large brushes handle big industrial tasks. We recommend synthetic bristles for most liquid glues. Unlike natural hair, synthetic fibers don’t soak up too much moisture or swell. This keeps the brush shape perfect. A clean brush makes for a professional, smooth finish every single time.
Cleaning Your Tools After Use
Don’t let your tools go to waste. Warm soapy water is usually enough to save your brushes for the next job. You must act fast because dried glue ruins brushes quickly. A single quality brush can cost between KSh 150 and KSh 800 depending on the size. Taking five minutes to wash them saves you money and prevents unnecessary waste. This small act of care protects your investment and honors the hard work put into your project.
Ready to start your next project with the best materials? Explore our range of premium liquid cold glues to get started today.
Trust the Heritage of Thika Wax Works Adhesives
Since the 1950s, Thika Wax Works has been a steady hand in Kenyan homes and factories. We’ve spent over 60 years perfecting our craft right here in the heart of the country. Knowing how to apply liquid adhesives is much simpler when you’re using a product built for our specific environment. Our liquid cold glues are like a strong handshake; they’re reliable, honest, and meant to last. We focus on premium quality because we know your projects represent your hard work and your family’s future. You can see our full history of excellence on our about us page.
We believe that a good glue should be the invisible hero of your work. It should hold things together so well that you forget it’s even there. Whether you are a small business owner or a DIY enthusiast, our products help you thrive by providing bonds that don’t snap under pressure. We’ve grown from a small operation in the 1970s to a trusted market leader by keeping our promises to every customer. Our liquid adhesives are designed to handle tough industrial jobs while remaining easy enough for a child’s school project. For businesses looking to optimize their production lines, understanding the differences between PVA vs dextrin adhesives can help you choose the right formula for your specific manufacturing needs.
Made in Kenya for Kenyan Projects
Kenya has unique weather that can be tough on imported glues. From the humid coastal air in Mombasa to the dry heat of the Rift Valley, our formulas are tested to survive it all. Local manufacturing means we understand your specific needs better than anyone else. We follow strict international standards, but we remain a local champion at heart. Our products offer 100% durability and long-lasting protection for your furniture, shoes, or industrial parts. When you choose us, you’re supporting the local economy and getting a product designed for our specific conditions.
Expert Support for Your Next Project
We do more than just sell glue; we provide solutions for your workshop. Think of us as your experienced partner in every build. If you have a “sticky” problem you can’t solve, reach out to our team. We’ve helped thousands of people understand how to apply liquid adhesives to tricky materials like smooth plastics or heavy timber. Don’t let a difficult repair slow you down. Contact us today for expert advice on your specific adhesive needs. We’re here to make sure your next project is a total success.
Start Bonding Your Projects with Confidence
Mastering how to apply liquid adhesives is a practical skill that saves you time and money on every repair or build. You now know that a successful bond starts with a clean surface and ends with the right amount of clamping pressure. Since the 1950s, Thika Wax Works has manufactured industrial-strength formulas that serve both small homes and large factories across East Africa. We’ve spent over 60 years perfecting our products to ensure they withstand the local climate and heavy daily use. Our glues are trusted by over 5,000 professional woodworkers and manufacturers who need results that last for generations. Whether you’re fixing a favorite kitchen chair or assembling new office furniture, the right tools make all the difference. We take pride in being a Kenyan champion that delivers international quality to your doorstep. You can trust our heritage to keep your hard work held together firmly. Take the next step in your crafting journey by choosing a glue that’s as hardworking as you are.
Browse Our High-Quality Liquid Cold Glues
Your projects deserve the strength and care that only decades of local experience can provide.
Frequently Asked Questions
How long does liquid glue take to dry completely?
Most quality liquid glues dry to the touch within 30 minutes, but you must wait 24 hours for the bond to reach full strength. This 24 hour period allows the moisture to evaporate completely, ensuring your project stays together for years. Since the 1950s, we’ve found that patience builds the strongest bonds, so it’s best to leave your items undisturbed overnight.
Can I use liquid glue on wet surfaces?
You shouldn’t use standard liquid glue on wet surfaces because the water prevents the adhesive from grabbing the material properly. Think of it like trying to walk on a floor covered in soap; you’ll just slip instead of finding a grip. For the best results in the Kenyan climate, ensure your surfaces are 100 percent dry. You can find our water resistant options on our adhesive product page.
What is the best way to clean up spilled liquid glue?
Wipe away wet glue immediately using a cloth soaked in warm water before it has a chance to set. If the glue has already dried, you might need a small amount of acetone or a plastic scraper to remove the residue. Acting within the first 60 seconds of a spill makes the cleanup 90 percent easier and protects your household surfaces from permanent marks.
How much glue is considered ‘too much’?
You’ve used too much glue if it squeezes out from the sides when you press two pieces together. Learning how to apply liquid adhesives correctly means using a thin, even layer that looks like a light mist rather than a heavy puddle. A single 100ml bottle should cover approximately 1 square meter of surface area if you use the proper spreading technique.
Can I speed up the drying time of my adhesive?
You can reduce drying time by 25 percent if you use a fan to increase airflow around the bond. Avoid using high heat from a hair dryer, as temperatures above 40 degrees Celsius can cause some glues to become brittle. A steady, cool breeze is the most reliable way to help the liquid set faster without sacrificing the long-lasting quality we’ve promised since the 1950s.
Does liquid glue expire or go bad in the bottle?
Liquid glue typically stays fresh for 12 to 24 months if you keep the cap tight and store it in a cool spot. After 2 years, the chemicals may separate or thicken, making the glue difficult to spread. Our Made in Kenya adhesives are tested for stability, but we recommend buying only what you need for your current projects to ensure peak performance.
Is liquid glue safe to use on fabric and clothing?
Standard liquid glues aren’t recommended for fabric because they can make the material stiff and leave a visible yellow stain. In 85 percent of cases, a general purpose adhesive will soak through the fibers and create a hard spot that feels uncomfortable against the skin. For clothing repairs, it’s better to use a dedicated fabric glue that remains flexible after it dries completely.
What should I do if the glue gets on my skin?
Soak your skin in warm, soapy water for 5 to 10 minutes to soften the bond before gently peeling it away. Don’t pull the glue off quickly, as this can damage your skin like pulling off a rough bandage. If you’re using a stronger industrial glue and it doesn’t budge, apply a bit of vegetable oil or margarine to help break down the stickiness safely.